
Cómo hacer embutidos paso a paso | Guía casera para hacer embutidos
If you’ve ever wondered how to make sausage from scratch, you’re in for a treat! Making sausage at home allows you to customize flavors, control ingredients, and enjoy the satisfaction of creating your own delicious sausages. In this comprehensive step-by-step guide, we’ll walk you through the entire process of making sausage from raw materials to the final mouthwatering product. Get ready to embark on a flavorful culinary adventure with the help of professional equipo de procesamiento de carne.
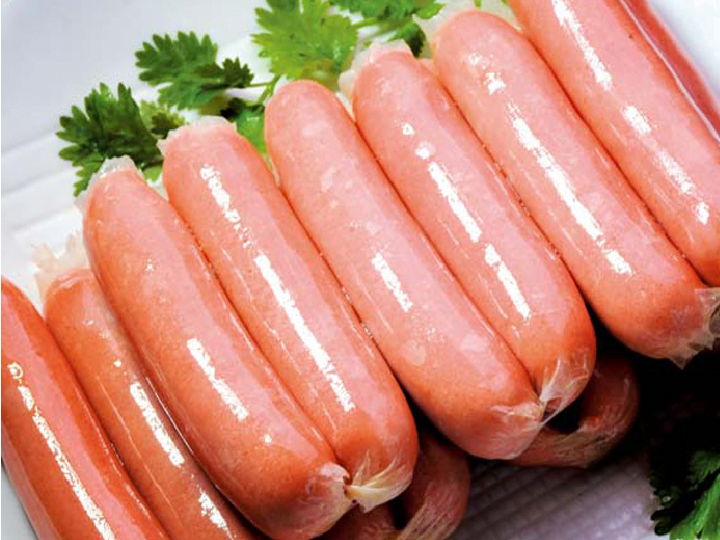
Sección 1: Preparación de materias primas
Start by selecting high-quality meats such as pork, beef, or a combination of both. For the best results, use meat with a fat content of around 20-30% to ensure juicy and flavorful sausages. Ensure that the meat and fat are properly trimmed and cut into smaller pieces (1-2 inch cubes) for easy processing through a máquina picadora de carne. Quality ingredients lay the foundation for a delectable sausage, so invest in fresh, high-quality meat from a reputable source.
Sección 2: Molido y Mezclado
Using a moledora de carne, pass the meat and fat through to achieve the desired texture. For most sausages, a medium grind is recommended, but you can adjust based on personal preference. Once ground, transfer the mixture to a mixing bowl or sausage mixer. Here, combine the ground meat and fat with an array of spices, seasonings, and other desired ingredients. Popular seasonings include salt, pepper, paprika, garlic powder, and fennel seeds. Mix thoroughly for 3-5 minutes to evenly distribute the flavors throughout the sausage mixture and develop the protein structure.
Sección 3: Rellenado
Attach a sausage stuffing tube or nozzle to a Máquina de embutir salchichas. Carefully slide a casing, whether natural (made from animal intestines) or artificial (collagen or cellulose), onto the nozzle, leaving a small overhang. Fill the sausage stuffer with the prepared mixture and start pushing it through the nozzle, gradually filling the casing. Maintain consistent pressure to avoid air pockets, ensuring a perfectly stuffed sausage. If you notice air pockets, use a pin to prick them gently.
Sección 4: Enlazado o Porcionado
Once the casing is filled, it’s time to create individual sausages. Twist and pinch the sausage mixture at regular intervals (usually 4-6 inches apart) along the filled casing to form links. Alternatively, if you prefer uniform portions, consider using a sausage linker for automated and precise linking. For the best results, let the linked sausages rest for 30-60 minutes before cooking to allow the flavors to meld.
Sección 5: Cocción o Ahumado
Choose your preferred cooking method based on the type of sausage you’re making. Options include steaming, boiling, baking, or grilling. Ensure the sausages are cooked to the recommended internal temperature (160°F/71°C for pork and beef sausages) for optimal food safety. To add a smoky flavor, consider smoking the sausages in a smokehouse using wood chips such as hickory, apple, or mesquite. Smoking typically takes 2-4 hours at a temperature of 160-180°F.
Sección 6: Enfriamiento y Control de Calidad
Después de cocinar o ahumar, deja que las salchichas se enfríen a una temperatura segura (por debajo de 40°F/4°C) en 2 horas. Puedes acelerar el proceso usando rejillas de enfriamiento o colocándolas en un baño de hielo. Aprovecha esta oportunidad para inspeccionar las salchichas en busca de irregularidades, como bolsas de aire, roturas o decoloración. Retira las salchichas defectuosas para mantener la máxima calidad. Un enfriamiento adecuado es crucial para la seguridad alimentaria y prolonga la vida útil de tus salchichas.
Sección 7: Embalaje y almacenamiento
Empaqueta tus salchichas caseras usando materiales de almacenamiento adecuados, como bolsas al vacío, tripas o bandejas. Etiqueta los paquetes con información esencial, incluyendo el tipo de salchicha, fecha de producción y instrucciones de almacenamiento. Guarda las salchichas en el frigorífico a 40°F/4°C o menos durante hasta 3-4 días, o en el congelador a 0°F/-18°C durante hasta 2-3 meses. Para un almacenamiento más prolongado, considera sellar al vacío para evitar quemaduras por congelación.
Consejos profesionales para salchichas caseras perfectas
- Mantén todo el equipo y los ingredientes fríos durante todo el proceso para garantizar la seguridad alimentaria y mejorar la textura
- Experimenta con diferentes combinaciones de especias para crear perfiles de sabor únicos
- Utiliza tripas naturales para una textura y sabor más auténticos
- Considera añadir ingredientes líquidos como vino, cerveza o caldo para mayor humedad y sabor
- Limpia todo el equipo a fondo después de usarlo para evitar la contaminación cruzada
Resumen
Congratulations! You’ve successfully mastered the art of making homemade sausages. By following this step-by-step guide and using quality equipo de procesamiento de carne, you can create mouthwatering sausages bursting with flavors customized to your liking. Experiment with different ingredients, seasonings, and cooking methods to craft your own signature sausages that will impress family and friends. Whether you’re making breakfast sausages, Italian sausages, or bratwurst, the process remains largely the same. Enjoy the satisfaction of indulging in delicious sausages made with your own hands, and don’t forget to share your creations with others!
For more information on sausage making equipment and supplies, visit our línea de producción de salchichas page to explore professional solutions for both home and commercial use.