
Jak zrobić kiełbasę krok po kroku | Przewodnik domowego wyrobu kiełbas
If you’ve ever wondered how to make sausage from scratch, you’re in for a treat! Making sausage at home allows you to customize flavors, control ingredients, and enjoy the satisfaction of creating your own delicious sausages. In this comprehensive step-by-step guide, we’ll walk you through the entire process of making sausage from raw materials to the final mouthwatering product. Get ready to embark on a flavorful culinary adventure with the help of professional sprzęt do przetwarzania mięsa.
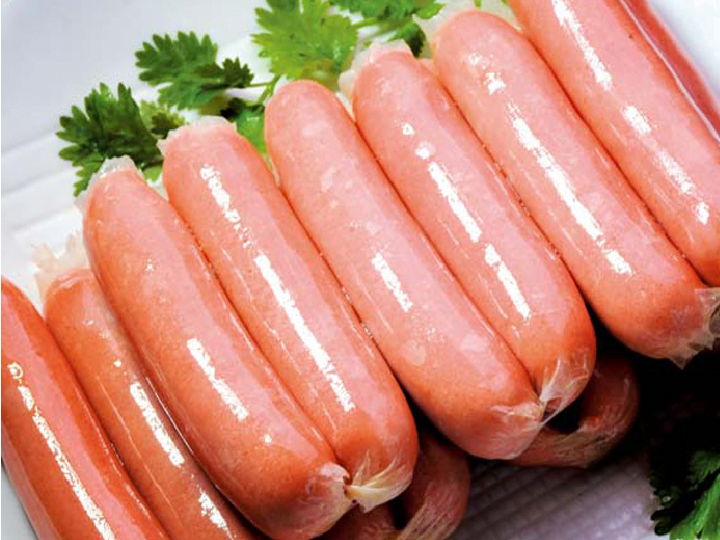
Sekcja 1: Przygotowanie surowców
Start by selecting high-quality meats such as pork, beef, or a combination of both. For the best results, use meat with a fat content of around 20-30% to ensure juicy and flavorful sausages. Ensure that the meat and fat are properly trimmed and cut into smaller pieces (1-2 inch cubes) for easy processing through a młynek do mięsa. Quality ingredients lay the foundation for a delectable sausage, so invest in fresh, high-quality meat from a reputable source.
Sekcja 2: Mielenie i mieszanie
Using a młynek do mięsa, pass the meat and fat through to achieve the desired texture. For most sausages, a medium grind is recommended, but you can adjust based on personal preference. Once ground, transfer the mixture to a mixing bowl or sausage mixer. Here, combine the ground meat and fat with an array of spices, seasonings, and other desired ingredients. Popular seasonings include salt, pepper, paprika, garlic powder, and fennel seeds. Mix thoroughly for 3-5 minutes to evenly distribute the flavors throughout the sausage mixture and develop the protein structure.
Sekcja 3: Nadawanie kształtu
Attach a sausage stuffing tube or nozzle to a maszyna do napełniania kiełbas. Carefully slide a casing, whether natural (made from animal intestines) or artificial (collagen or cellulose), onto the nozzle, leaving a small overhang. Fill the sausage stuffer with the prepared mixture and start pushing it through the nozzle, gradually filling the casing. Maintain consistent pressure to avoid air pockets, ensuring a perfectly stuffed sausage. If you notice air pockets, use a pin to prick them gently.
Sekcja 4: Linkowanie lub porcjowanie
Once the casing is filled, it’s time to create individual sausages. Twist and pinch the sausage mixture at regular intervals (usually 4-6 inches apart) along the filled casing to form links. Alternatively, if you prefer uniform portions, consider using a sausage linker for automated and precise linking. For the best results, let the linked sausages rest for 30-60 minutes before cooking to allow the flavors to meld.
Sekcja 5: Gotowanie lub wędzenie
Choose your preferred cooking method based on the type of sausage you’re making. Options include steaming, boiling, baking, or grilling. Ensure the sausages are cooked to the recommended internal temperature (160°F/71°C for pork and beef sausages) for optimal food safety. To add a smoky flavor, consider smoking the sausages in a smokehouse using wood chips such as hickory, apple, or mesquite. Smoking typically takes 2-4 hours at a temperature of 160-180°F.
Sekcja 6: Chłodzenie i kontrola jakości
Po ugotowaniu lub wędzeniu pozwól kiełbasom ostygnąć do bezpiecznej temperatury (poniżej 40°F/4°C) w ciągu 2 godzin. Możesz przyspieszyć proces za pomocą stojaków do schładzania lub zanurzyć je w wodnej kąpieli. Skorzystaj z okazji, aby sprawdzić kiełbasy pod kątem nieprawidłowości, takich jak pęcherzyki powietrza, pęknięcia lub przebarwienia. Usuń wadliwe kiełbasy, aby utrzymać najwyższą jakość. Prawidłowe schładzanie ma kluczowe znaczenie dla bezpieczeństwa żywności i przedłuża trwałość kiełbas.
Sekcja 7: Pakowanie i przechowywanie
Opakuj domowe kiełbasy przy użyciu odpowiednich materiałów do przechowywania, takich jak torby próżniowe, osłonki lub tace. Oznacz opakowania podstawowymi informacjami, w tym rodzajem kiełbasy, datą produkcji i instrukcjami przechowywania. Przechowuj kiełbasy w lodówce w temperaturze 40°F/4°C lub niższej przez 3–4 dni lub zamroź w 0°F/-18°C przez 2–3 miesiące. Dla dłuższego przechowywania rozważ vakuum, aby zapobiec utracie jakości.
Wskazówki ekspertów do idealnych domowych kiełbas
- Przy całym procesie utrzymuj cały sprzęt i składniki w chłodzie, aby zapewnić bezpieczeństwo żywności i poprawić teksturę.
- Eksperymentuj z różnymi kombinacjami przypraw, aby stworzyć unikalne profile smakowe.
- Używaj naturalnych osłon (skorupek) dla bardziej autentycznej tekstury i smaku.
- Rozważ dodanie płynnych składników, takich jak wino, piwo lub bulion, dla dodatkowej wilgoci i smaku.
- Dokładnie wyczyść cały sprzęt po użyciu, aby zapobiec krzyżowemu zanieczyszczeniu.
Podsumowanie
Congratulations! You’ve successfully mastered the art of making homemade sausages. By following this step-by-step guide and using quality sprzęt do przetwarzania mięsa, you can create mouthwatering sausages bursting with flavors customized to your liking. Experiment with different ingredients, seasonings, and cooking methods to craft your own signature sausages that will impress family and friends. Whether you’re making breakfast sausages, Italian sausages, or bratwurst, the process remains largely the same. Enjoy the satisfaction of indulging in delicious sausages made with your own hands, and don’t forget to share your creations with others!
For more information on sausage making equipment and supplies, visit our Linia produkcyjna kiełbas page to explore professional solutions for both home and commercial use.